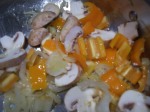
The Potato BBQ Thing

Baked potatoes are nice. And all sorts of side dishes are great. But there are lots of days when you just want to put something on the grill, slice up some tomatoes (maybe dress them up “Jamie style”) and eat.

When that happens, we fall back on the “BBQ Potato Thing” as a real go-to dish. This recipe originally came from our friend Helena, but it’s been changed and adapted a bit over the years.

Start with two large pieces of foil, laid out on the counter in a cross (probably about 24″ long, each).

Onto these, slice up some red potatoes, skins on, about 1/4″ thick. (Peel them if they’re unsightly old potatoes!). I use one potato per person. Add a sliced onion (or two, as you like) and a diced bell pepper (or two, depending on the number of people. Give it a good grinding of pepper, and a little salt. Toss in chopped herbs if you have some (the other night, when we took this photo, we used tarragon). Drizzle with olive oil – not too much, maybe a couple of tablespoons at the most.

Toss this together, then wrap – fold one piece of foil and roll the ends together, then use the other piece and do the same, the opposite way, to form a strong package.

Put this on the gas grill while you’re preheating, turning once. Leave it on the grill while you prepare some chops or chicken breasts, turning occasionally. By the time the meat is done, the Potato Thing will be, as well – and when you serve it up, it will look like you worked a lot harder than you did.

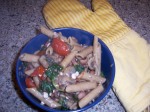
Change of Plans

Sometimes in a busy household a change of plans can make the day’s meal plan impractical. Or fresh foods can spoil a little faster than anticipated. In our case, some spinach that ended up not being used on Sunday, became the basis for dinner on Monday.

It was one of our usual go-to meals: some vegetables and beans (or cheese) tossed together with a whole-grain pasta. In this case, some spelt penne was the pasta star. While it cooked we sauteed an onion, and added half a dozen mushrooms. A splash of red wine, a packet of baby tomatoes, and the spinach in question came next, followed by a couple of cups of cooked beans. This simmered over low heat until the pasta was done. Then we tossed everything together and covered it, on low heat, for 4-5 minutes just to let the flavours come together. Finally, a sprinkling of feta for a salty-sharp accent. A casual, comforting end to a long day.

More Pizza, Please!

Sliced onionsFlour for pizza doughFor our Caramelized Onion and Mushroom Pizza, we started with the same basic crust as the Delicious Artichoke Pizza, but we put some chopped fresh tarragon in the dough.

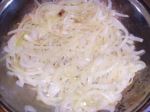
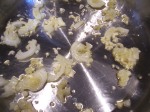
Meanwhile, we were caramzelizing the onions…two onions, thinly sliced, and about a tablespoon (15ml) each of butter aPizza Doughnd olive oil. Yes, it’s an indulgence…but well worth it. Onions cookingWe also added about 5ml of maple syrup to add an extra flavour note. Cook the onions over medium-low to medium heat, stirring often, as they turn a delicious golden brown. When they look not quite brown enough, stop…they’ll continue to cook a bit. When you’re nearly at the end, add a tablespoon or so of white wine vinegar (balsamic would work also), and about a quarter cup (60ml) of water. Stir, cover, and let this stand and cool until your dough is doubled in size (about 10 minutes).
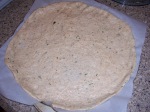
Next, press the dough out into a circle on a piece of parchment. This makes a Pizza crustmedium-thin crust on a standard pizza pan. Divide in two if you like extra-thin, or use a smaller circle if you want a thick crust.

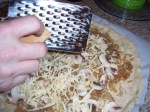
Use the onions instead of sauce. Top with sliced mushrooms – we used a mix of cremini (brown) and white (button) mushrooms, but any kind you like will work. We topped this with some nutty gruyere and a Adding Cheese to Pizzabit of part-skim mozza.

Pizza ready to go in the ovenAt 400F, the pizza doesn’t take long – about 18 minutes. Then cool on a board for about 4 minutes, slice, and indulge yourself in onion-y goodness.

Pizza...ready to eat

Easter Bunny Cake

Bunny CakeFor our family, it wouldn’t be Easter dinner if there weren’t a bunny cake.  Long after kids aren’t really kids any more, they aren’t willing to dispense with this cake, in all its ’50’s style glory.

It starts as two round cakes (8 or 9 inches in diameter). Make a carrot cake (traditional) or use a mix – any flavour will do.

One cake is cut into sections, with two ears, leaving the centre of the circle to make the bow tie.

The whole thing is iced with Italian Meringue Frosting, tinted appropriately. Each year there’s an argument about whether the bow tie should be pink, or mauve, or green, or yellow. Mauve or pink are easiest, since the pink frosting for the ears can be prepared, and then a little blue food colouring added as necessary.

The candies are Smarties(TM) but other small round candies such as M&Ms (TM) would work as well. The whiskers are made of shoelace-style red licorice. The fur is coconut, preferably the long-shredded variety.

Hot Cross Buns for Easter

Hot Cross BunsSome say it is traditional to eat Hot Cross Buns on Good Friday, but in our family they have been Easter breakfast for as long as we can remember. The cross traditionally symbolizes the crucifiction, and they serve as a reminder to us that Easter is not all about bunnies and candy (although we indulge in our share of those, as well).

Magic Beans!

Easy vegetarian meals often call for canned beans. But in our efforts to watch our weight, we started to learn a lot more about label reading. One thing we’re really careful about is sodium – it makes a huge difference! A rule of thumb we learned was to read the calories per serving on the nutrition label. Then, if the milligrams of sodium per serving is higher than the calorie count, avoid it! Sounds easy, right? Unfortunately it’s the dirty secret of lots of canned foods – they have a lot of sodium. Even healthy choices like beans or soups are a problem. So we make our own beans now, on days when we’re busy working around the house, doing chores, laundry, or whatever. A few weeks ago we made some black-eyed peas…and they’re the star of today’s recipe. We grabbed a one-cup tub out of the freezer at breakfast time and let it thaw for the day…

Then we started dinner by putting some whole wheat pasta on to cook in a big pot of unsalted water. (Two ounces or 60g of dried whole wheat pasta per person is plenty!)

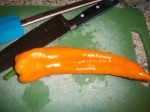
Then, while the past cooks…start a little onion (one small one) and garlic (two cloves) in a couple of teaspoons (10ml) of chili oil. We also chopped in a sweet, sweet pepper we picked up at Plank Road, around the corner. Next, some sliced mushrooms for texture, just rinsed and sliced. Keep stirring as you add the veg.

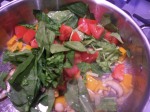
After the pepper, a good big handful of spinach, washed and chopped, and a diced fresh  tomato go in the pot. Put the lid on, and turn heat to low for about 5 minutes to wilt the spinach.
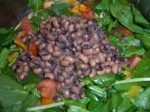
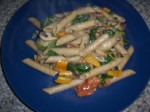
Finally, it’s time for the beans. Dump them into the pan, along with about a tablespoon (15 ml) of pesto (check the types and buy the one with the least sodium!) . Pop the lid back on and simmer all of this until it is bubbling hot and ready to receive the pasta – just a few minutes should do. Then tip in the pasta, stir, sprinkle with a little cayenne, and lid the pan again. Let it simmer over very low heat for the flavours to meld.

Finally, when the flavours have had a chance to come together, serve! If you want, shave a little sharp cheddar on top, but you won’t need too much. An ounce or so should do between the two plates (that’s about 30 grams). Happy eating!

There's Never Enough Bread

This week’s bread: multigrain!

When I posted the recipe for whole wheat bread, I mentioned that you can dress it up, or dress it down. You can also turn it into a completely different kind of bread…and suddenly it’s not just whole wheat any more.

This one’s multi-grain. (Don’t worry…those dark brown spots are a couple of stowaway raisins that got into the recipe!)

Instead of the six cups of whole wheat flour, for this batch I used two of whole wheat, two of rolled oats, and two of cornmeal. I also tossed in half a cup of flax seeds that needed to get used up. The recipe takes the same amount of white flour as in the original recipe, and all the other instructions are exactly the same.

Make Yourself Comfortable

Sometimes comfort food is what you need. I’d put tuna sandwiches on the menu plan, but it was a cold day. There were too many things on my plate.

Earlier in the week we had picked up some delicious Black River Cheddar at Better Bulk. It is creamy, crumbly, sharp, and completely awesome. It’s the kind of cheddar that makes anything better!

The melts started with some toasted whole wheat bread. For the topping (makes enough for four slices): 1 can of water-pack tuna, 1 tomato, diced, and a tablespoon or 15ml each of Dijon and light mayo. If you have some herbs, by all means, chop them in. I used dill. Mix this and put on the bread, on a broiler-proof pan. Grate on some cheddar. Under the broiler til bubbly, and you’re set. Don’t forget the pickle!

Mmm…Yeasty Goodness

My bread obsession knows no bounds. This batch, just getting ready for the second rising, is whole wheat. When I was a kid, my grandmother would make most of our bread – sometimes every day. I would have preferred the squishy white bread that some of the other kids had in their lunches. I didn’t know how good I had it!

On the left is my “fancy loaf”. Most of the recipes I make yield four loaves, allowing a more energy-efficient use of the oven (and the bread-making hands). So I always do something special with at least one. In this case, when shaping the loaf, I sprinkled in oregano and snippets of sundried tomato. Then I also sprinkled a little oregano on top. Perfect for a savory accompaniment to some cold-day food.

Sure, the bread-making tends to fall off a little in the summer when it gets too hot. But as much as possible, I prefer to make my own rather than buy it in a store. I guess my grandmother was a pretty smart cookie after all! (And speaking of cookies…naw, let’s save that for another time).

Leftovers for Lunch

Chili Braised Beef and Kitchen Sink SaladOne of the things about shopping and eating as locally as possible is (1) you need to learn to menu plan and (2) you have to be willing to adjust the menu plan.

We were all set to have a nice big Kitchen Sink Salad (more on this later!) for lunch today, because we’re working in the home office. But we had this great Chili Braised Beef  last night, and there was some left over. You can’t just let a batch of slow-cooked deliciousness go to waste, so we halved the salad and used up the reheated beef. I admit it isn’t quite as pretty as yesterday…but like chili, it sure tastes great on the second day.

Now as for the Kitchen Sink Salad, it’s just what it sounds like – a big bowl of vegetable yumminess. Here’s what we featured today:

Start with the dressing – an acid, some mustard, and oil. In our case, the zest and juice of 1/2 an orange, 15ml/1 tbsp. sesame oil, and 15ml / 1 tbsp. Dijon mustard. Whisk this together. Then I grated in 1/2 a red and 1/2 a yellow heritage carrot I bought at Kelly’s. Next, some artisanal lettuce – curly endive and a bit of butter lettuce. There was a bit of broccoli – not enough for two, but enough for salad. I steamed it for a minute to take the edge off the crunch, but when I’m in a hurry I’ll just chop it a bit more. Peel and dice the remainder of the orange, and throw in a few black sesame seeds, sunflower seeds, and almonds for good measure.

Toss it all together and start imagining – you can change the ingredients every time. Beans instead of nuts – sure! Vinegar instead of orange? Why not? Olive oil, or canola…yum!